
I Built an Automated Workflow to Create SEO Content Briefs. Here’s Exactly How It Works.

I wanted my first Rankly Speaking experiment to be something I’d use frequently. So it was a no-brainer to settle on SEO content briefs.
I’ve created them a gazillion times. The process is always the same:
- Research keywords
- Figure out which ones are the most relevant to your article
- Decide what the article should cover
- Document everything
If I could automate this process, I’d be saving at least 2 hours of work. Sweet deal!
Here’s the first version of what I built, how it works, and what broke along the way.
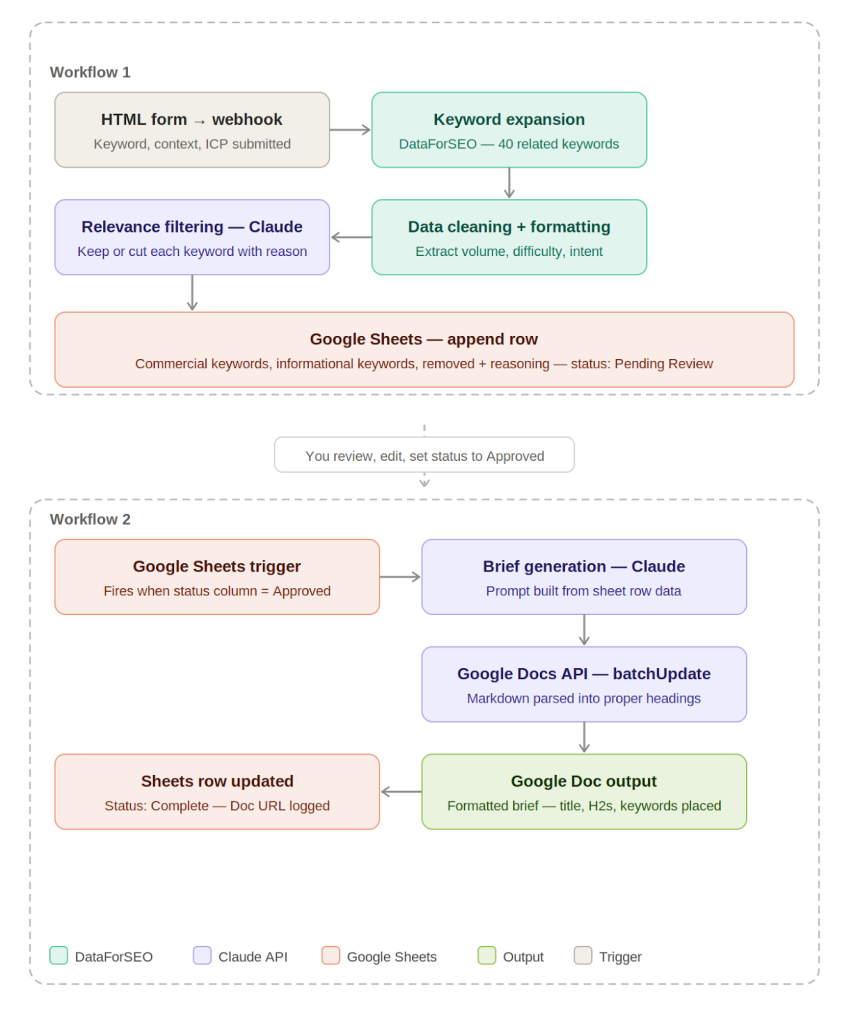
How does the workflow work?
The workflow is built on n8n. It’s triggered when you submit a form with three inputs: your target keyword, the business/product description, and the content’s ideal audience.
By the time you’re done, you have a Google Doc with a complete SEO content brief that contains:
- A recommended title tag
- H1
- Meta Description
- H2 structure with keyword placement notes
- Intent analysis
- Word count suggestion
- And, positioning notes.
The initial idea was to have all of this happen in a single workflow. But for reasons which I’ll mention later, I had to turn this into a 2-part workflow.
The first part does the keyword analysis and allows you to review the results. The second part produces the brief.
It looks really clean on paper, yeah? I took a really messy path to get here.
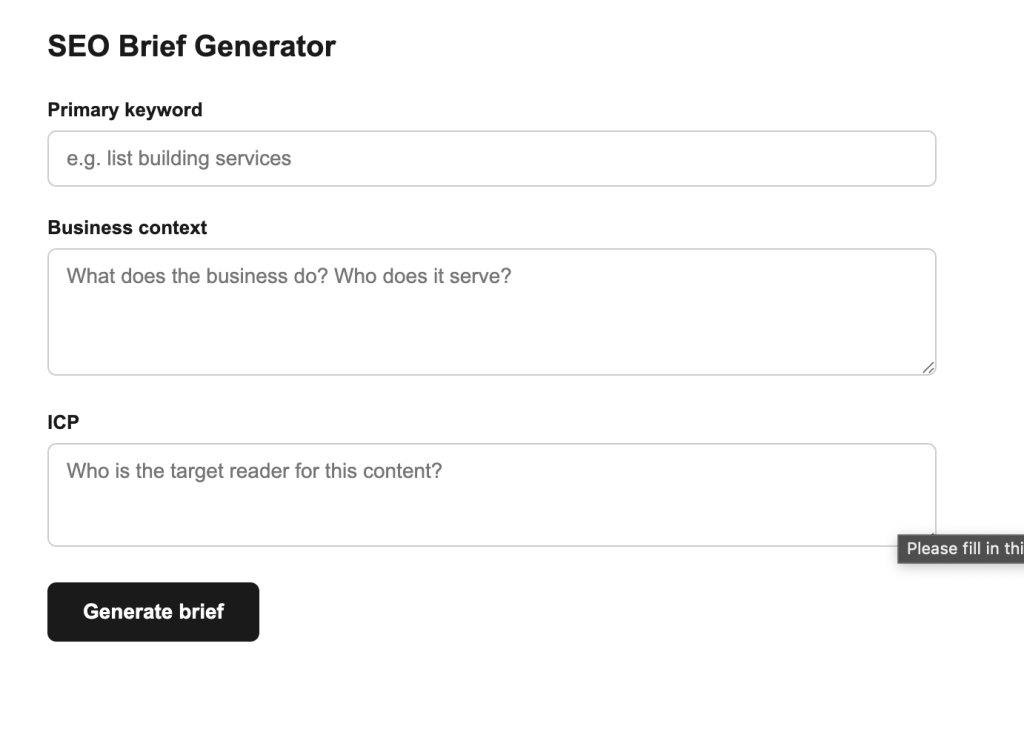
Creating the trigger
The trigger is a simple HTML form with 3 fields: primary keyword, business context, and ICP.
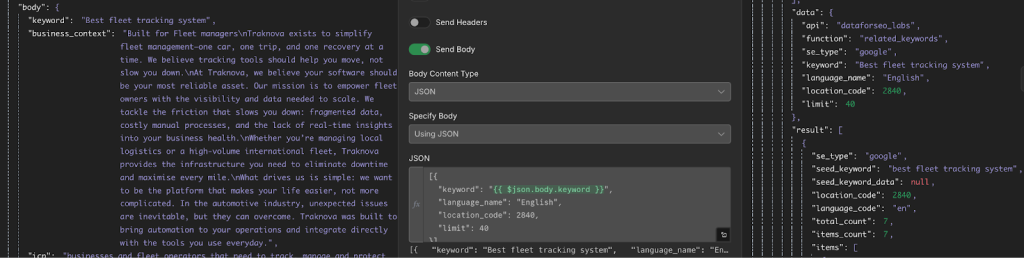
Expanding the keyword list with DataForSEO
When you hit “Generate brief”, the form sends a POST request to a webhook which then passes the primary keyword to DataForSEO. DataForSEO returns all keywords related to the primary keyword.
Using Claude to filter the keywords for relevance
DataForSEO returns an array of keyword options. But not all of them are relevant to the business. I used Claude as a filter at this stage to extract only the keywords that are relevant to the business and ICP.
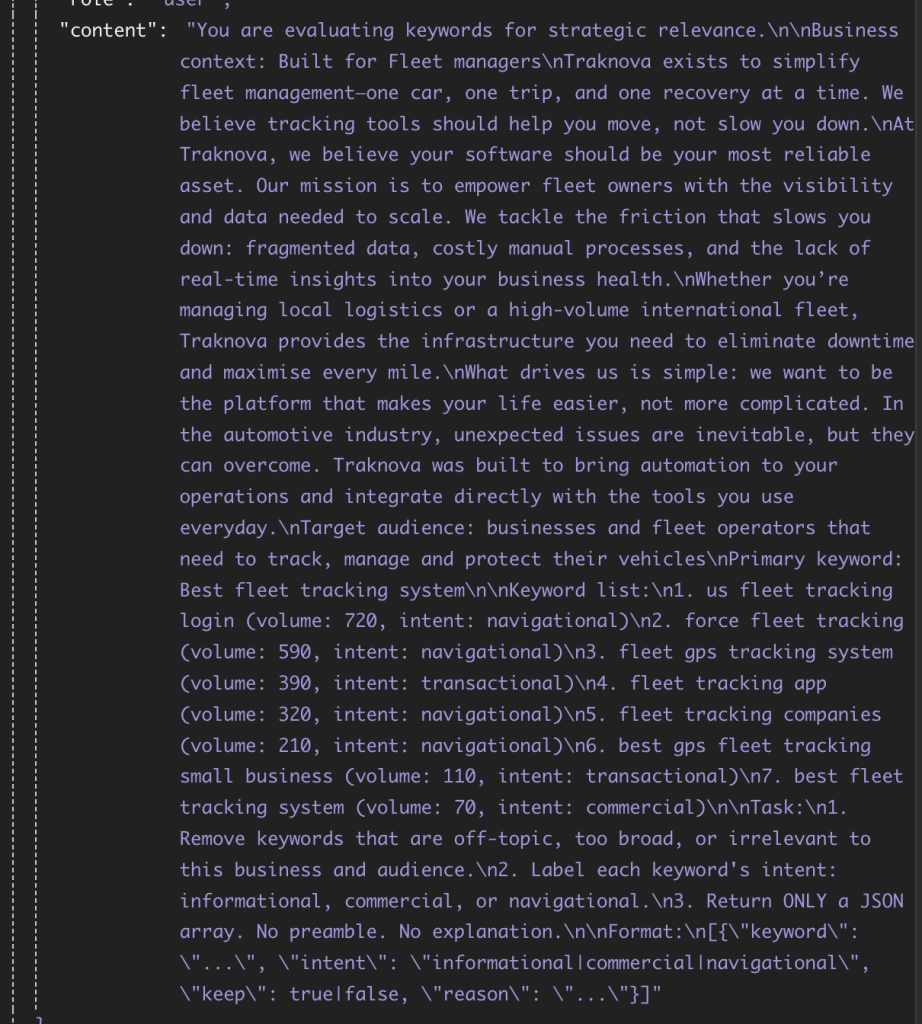
(Prompt used)
Writing the keywords to a spreadsheet
Claude’s reasoning helps me filter each keyword into 3 buckets: commercial, informational, and REMOVED, and it provides reasons behind each decision. I added a Google Sheets append node to write all three buckets into a new row in a spreadsheet.

When the row is written, Status is set to “Pending Review” and Workflow One is complete.
To wait or not to wait
I planned to keep everything in a single workflow, and use a Wait node to pause execution while I reviewed the keywords. I’d get an email with the keywords, and after review, click a link that will resume the workflow.
But after spending a day trying to get this to work, I decided to split the workflow into two parts.
Workflow One ends at the Spreadsheet. Workflow Two is triggered by a change to the Status column in the same spreadsheet.
For instance, if the column is changed from Pending Review to Approved, Workflow Two fires automatically.
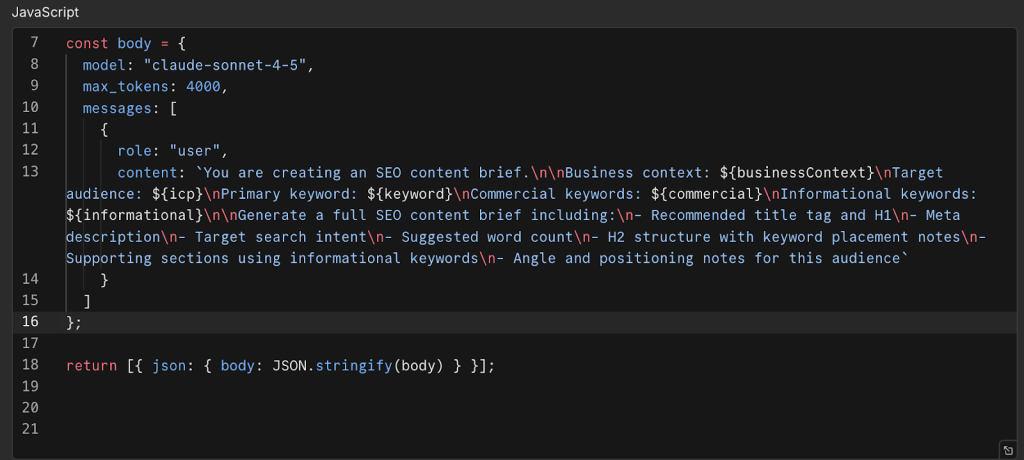
Using Claude to write the content brief
Once a change is made to the Status column, a JS node passes the primary keyword, business context, ICP, commercial keywords, and informational keywords to Claude to generate a full SEO brief.
Writing to Google Docs with proper formatting
Finally, the brief goes into an automatically created Google Doc.
I got better at…
Reading error outputs!!! At the start of this project, I was copying every error into Claude to find out what was wrong.
By the end I could look at an output and immediately spot whether it was a nesting issue, an invalid parameter, or an invalid node reference. In some way, that also tells you how complex this build was for me.
But it gets easier from here on…I think.
Is It Worth Building?
Definite yes, if you create SEO content briefs regularly and want a repeatable process that doesn’t depend on how much time you have on a given day.
Watch out for Claude API call failing with a JSON error. This happened a couple of times. Fix by building the request body in a Code node with JSON.stringify before the Claude HTTP Request node.
What’s Next
I’ll revisit the Wait node and see where I can get everything to happen in a single workflow. Although I must say that having two separate workflows made for a cleaner run and debugging.
If you’ve built something similar and have suggestions, I’d love to hear them.